Services

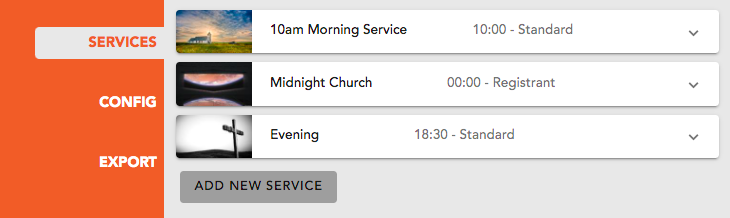
In this tab you can add, edit or delete a service.

NOTE: To add, edit or delete a service you will need the ‘Nametags – Admin’ permission’

Go to the Nametags Settings page, and find the ‘Services‘ tab.


Edit service details

The following fields are able to be changed in the ‘Services’ tab. Some fields are only available for specific service types where specified. For more information on service types see About Service Types.

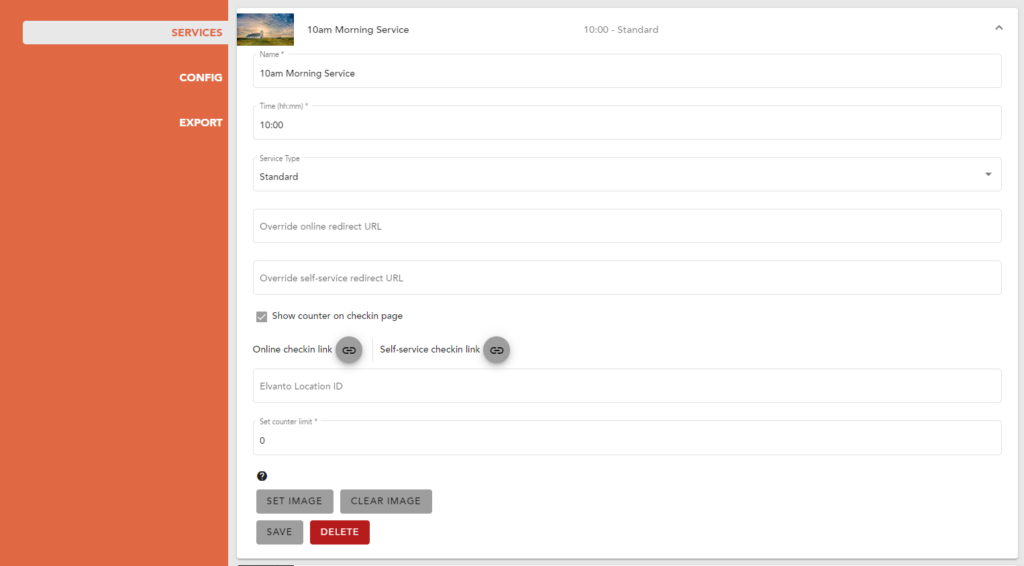
  • Name – An easy to recognise name for the service (this is only for Adminosaur)
  • Time – this needs to be in HH:MM format. This should correspond with the same service in elvanto, otherwise the import will create a new service with the time you enter here.
  • Service Type – There Are currently two service types: Standard and Registrant
  • Maximum Registrants – used to limit registrations in a Registrant Service. For more information see About Service Types
  • *OPTIONAL* Elvanto Location ID – This should be the location ID of service you are creating. This is only relevant if you want to see what ‘location’ people are in when they use the ‘I’m New’ form. If you use this, make sure you include the ‘Location’ field in the I’m New form configuration. Only used in a Standard service. Your location ID can be found by going to the relevant “location” in Elvanto and then copying the Location ID from the URL. The URL should look like this, with the location ID at the end: https://[your-elvanto-domain].elvanto.com.au/admin/settings/locations/[location-id]
    Please contact us for more information, or to find your location ID’s.
  • Override URL fields – allow you to set the redirect URL for mode #2 Online checkin or #3 Self-service checkin for this service only. These values take priority over the ones set in the Config tab.
  • Counter Limit – Will give a visual limit to the number of checked in people. Doesn’t limit the number of people that can check in. Only used in Standard service. For more information see About Service types
  • Online checkin link button – copies a link to mode #2 Online checkin to your clipboard (once copied you can paste the url).
  • Self-service checkin link button – copies a link to mode #3 Self-service checkin to your clipboard (once copied you can paste the url).
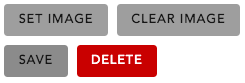
  • Image upload – please upload an image to be displayed as a background on the check-in page. This should be different for each service (as it helps you identify what service you are checking people in to)

To edit a service, click the service you want to edit. It will pop up with all the fields, allowing you to edit them. Press SAVE when you are finished.


Delete service

This will also allow you to delete the service if you choose. Please note that if you delete a service it will be permanently deleted from Adminosaur.

Import service attendance into Elvanto

To import information into Elvanto from your Adminosaur account, you will need Nametags ‘Admin’ access in Adminosaur and some admin privileges in Elvanto.

1. Go to your Export tab in Nametag Settings. Select the service you would like to import into elvanto, and select the date you would like this information from. Only dates where checkin information exists are listed. Press ‘export’. You will now be downloading a .csv file.
If you need to edit the data at this point, see our editing guide.

2. Go to the Services ‘Import’ section in Elvanto. Select the ‘Dates Vertical’ option.

3. Decide how you want to handle new people entered during this import by selecting the appropriate fields on the import page. This process will only import the name of the person, you will be able to add their contact details later if you like.
If you are using standard services, we recommend you process all the form submissions for new people (and create the new people in your Elvanto system) before you do the service import.

4. Press ‘Choose file’ and find the file you just downloaded from Adminosaur.

5. Ensure the date format is dd/mm/yyyy. Press Continue.

6. You should now have the option to select what fields are represented in each column. The first column is ‘Full Name (Last, First)’. It may appear to have random numbers and letters in the data, but this is actually the Elvanto ID for the person, allowing us to match them directly. The second column should be Service ‘Date and Time’.

7. If you are using the ‘Registrant’ service type and added new people in this process, and want their contact details in Elvanto, use the same file to do a People ‘Import’ in Elvanto. You will be able to match columns to the name, email address and phone number of the person. When matching fields to columns, it may be helpful to tick the box ‘Only overwrite this column for existing people if the field is empty’.

NOTE: Elvanto matches the time and date of the service with what exists in Elvanto, or creates a new service if nothing matches. Unfortunately, that means if you have two services that run concurrently, Elvanto may confuse the two and match people into the wrong one. If this is going to be an issue, we suggest changing the time of one service to starting a minute later, so that elvanto can match to the correct service.

Export (Nametags)

You need to have the ‘Nametags – Admin’ permission to access this section.

On this page you can export your services check-in information into a CSV file.

This file can then be imported into Elvanto or, when using a registrant service, be kept for Covid Contract tracing purposes. See Import service attendance into Elvanto for more information.

Nametag Settings

Nametags Settings can be accessed by clicking the gear icon in the top right of the yellow ‘Nametags’ tile on the Dashboard.

You need to have the Nametags ‘Admin’ permission to access this section.

There are three tabs in Nametags settings:

Services allows you to configure the services in your account.
Config allows you to configure other settings for this module.
Export allows you to export the checkin information.

Configure Allergy Information

To configure your allergy information, you will need Super admin access to your Elvanto account, and Groups ‘Admin’ access to your Adminosaur account.

1. Go to your People Categories in Elvanto, and select a people category.

2. Create a new custom field on the right hand side (if you do not already have one). The custom field needs to be a text field. Label it however you would like. Press save.

3. Go back and ‘Edit’ the new custom field by clicking the pencil next to the field on the right hand side.

4. There should be a new line under the ‘Label’ the has the ‘ID’ of the custom field. Copy and paste this ID into the ‘Allergies’ field in the Configuration tab of Group Settings.

Import group attendance into Elvanto

To import information into Elvanto from your Adminosaur account, you will need Groups ‘Admin’ access in Adminosaur and some groups admin privileges in Elvanto.

1. Go to your Export tab in Group Settings. Select the groups you would like to import into elvanto, and select the date you would like this information from. Only dates where checkin information exists are listed. Press ‘export’. You will now be downloading a .csv file. If you need to edit the data at this point, see our editing guide.

2. Go to the groups ‘Import‘ section in elvanto. Select the ‘Multiple Groups‘ option.

3. Press ‘Choose file‘ and find the file you just downloaded from Adminosaur.

4. Select ‘Individual names are in a single column and last name comes first‘ and change the date format to dd/mm/yyyy. Press Continue.

Sync information with Elvanto

You will need to be logged in to Elvanto and have Super Admin access.
You will also need to have the User Type ‘Admin’ permission in Adminosaur.

1. On the Church Settings ‘Integrations’ tab, type your Elvanto subdomain into the ‘Elvanto Domain’ box and select your domain extension (.com or .com.au).

2. In a new tab log in to your Elvanto account. Hopefully you have access to the admin section/settings/integrations section of the website. If not, ask a super user to log in for you and go here.

3. In the elvanto integrations section, click ‘Add’ and then select ‘Custom’:

App Name – “Adminosaur”
Description – Adminosaur
Leave the icon blank
Homepage – https://[subdomain].adminosaur.com/admin/
Redirect – https://[subdomain].adminosaur.com/admin/elvanto-auth
Click save

4. Once that is saved, you can click on the newly created integration again and it will have 2 extra pieces of information, a Client ID and a Client Secret. Copy and paste them into the ‘Integrations’ page in Adminosaur.

5. Press Sync down the bottom. You will be prompted to enter your elvanto details. Type in the username and password of a super admin. You should be re-directed back to Adminosaur.
This will sync your information in Elvanto with Adminosaur.


TROUBLESHOOTING FAQ:

Q: MY BROWSER REDIRECTS TO THE ADMINOSAUR LOGIN PAGE WHEN I TRY AND SYNC WITH ELVANTO.
A1: We have had issues with some version of Safari, so if you are using Safari try using Google Chrome instead
A2: Double check the Homepage and Redirect URL fields in the integrations section of Elvanto, they need to be exact. Make sure the [SUBDOMAIN] is replaced with your Adminosaur subdomain.

Sync my groups from Elvanto

1. In Elvanto, go to groups/categories.


Create a new category called “Adminosaur checkin“. (You can use your own category name if you would like, just remember what it is).

2. In Elvanto, find a group that you want to include in the application. In the ‘EDIT’ section of that group, find the new group category in the ‘category’ box and tick the checkbox. Press SAVE

You can assign more than one group if you would like.

3. In Adminosaur – go to the Integrations tab by clicking on the Church tile on the Dashboard and navigating to the Integrations tab. Resync your Elvanto account by clicking ‘SYNC‘.

4. In Adminosaur – go to Groups Settings by click the cog icon on the Groups tile on the Dashboard.

Select ‘Adminosaur checkin‘ from the groups category (or whatever you named the group).

5. The list of groups should now populate with the groups in the Elvanto group category.

Setup the ‘Add New Person’ Form (Groups)

You will need to be logged in to Elvanto and have access to the ‘Forms’ section.
You will also need to have the Groups ‘Admin’ permission in Adminosaur.

1. Add a new form in Elvanto. Title it however you would like.

2. Add the form fields you would like to have on the form. You MUST include the following fields, but can have additional fields if you would like. The fields can be in any order.

  • First Name’    = Elvanto First Name Person field
  • Last Name’    = Elvanto Last Name Person field
  • Mobile Number’   = Elvanto Mobile Number Person field
  • Allergies’     = Elvanto People custom field (as per custom field ID entered into the ‘Configuration‘ tab)
  • Parent First Name’   = Elvanto ‘form custom field’
  • Parent Last Name’   = Elvanto ‘form custom field’
  • Parent Mobile’     = Elvanto ‘form custom field’

3. Click ‘Embed‘ up the top right of the forms page in Elvanto.

In the ‘Link‘ section, you should see a URL in the style of 
https://[your-elvanto-domain].elvanto.com.au/form/[form-id].
Copy the form id from this URL.

4. Open up the Groups Settings section in Adminosaur by clicking the cog icon on the Groups tile on the Dashboard.


Paste the Elvanto form ID into the ‘Form ID’ field of the relevant group. Ensure you only include the form-id part of the URL, not the rest of it.

By repeating this process, you can have a different form for every group if you would like.

See a list of all children currently checked in

To see a list of all children currently checked in, you will need the ‘Groups – All Groups’ or ‘Groups – Admin’ permission.

1. Select the Groups tile on the Dashboard. Select the ‘All Groups‘ button. You will now see a list of all currently checked in children.

2. You will be able to ‘Checkout all’ by selecting the red button in the right.

You will also be able to check-out individual children by selecting the ‘Check Out’ button next to the individual child.