To add or edit a registrant service you will need the ‘Nametags – Admin’ permission.
There are two ways to create a registrant service:
Convert an existing service to a registrant service
Create a new service
Whichever method you choose, you can easily change the service back to a standard service at any time.
To convert an existing service, go to Settings ⚙ on the Nametags tile.
In the ‘Services’ tab, select the service you want to convert.
Change the “Service type” field to “Registrant”.
A field labeled “Maximum Registrants” will appear. The number you put in this field will set how many people are able to register for this service.
Press save when you are finished.
Please note that the Elvanto location ID field will be hidden when you convert a service. If you were using a location ID it will remember the ID if you convert the service back to a standard service.
To create a new service, go to Settings ⚙ on the Nametags tile, and find the ‘Services’ tab. Press the ‘Add New Service’ button. You will need to enter the following details:
Name – An easy to recognise name for the service (this is only for Adminosaur)
Time – this needs to be in HH:MM format. This should correspond with the same service in elvanto (if you are using elvanto), otherwise the import will create a new service with the time you enter here.
Service Type – Select “Registrant”
Maximum Registrants – Will limit the number of people who can register for the service. Doesn’t limit the number of people that can check-in. For more information see About Service types
Image upload – please upload an image to be displayed as a background on the check-in page. This should be different for each service (as it helps you identify what service you are checking people in to)
To convert a Registrant service back to a standard service, go to Settings ⚙ on the Nametags tile. In the ‘Services’ tab, select the service you want to convert. Change the “Service type” field to “Standard”.
A Standard Service allows people to check-in and print nametags using member information in Elvanto. It also has a counter that will track how many people have checked in to a service. To create a Standard service see Add a Standard Service.
The list of people this service type searches when using the check-in page is the list of people imported from Elvanto when you do a sync from the Integrations page.
Elvanto Location ID – This should be the location ID of service you are creating. This is only relevant if you want to see what ‘location’ people are in when they use the ‘I’m New’ form. If you use this, make sure you include the ‘Location‘ field in the I’m New form configuration.
Your location ID can be found by going to the relevant “location” in Elvanto and then copying the Location ID from the URL. The URL should look like this, with the location ID at the end:
Time – this needs to be in HH:MM format. This should correspond with the same service in elvanto, otherwise the import will create a new service with the time you enter here.
Standard Service Counter and Counter Limit
The counter will only be displayed on the check-in page if you are signed in to an Adminosaur account
If you click on the counter it will display a list of all the people who have checked in to that service. The people that checked-in with the “I’m New form will be listed under a separate heading.
The counter will display the number of checked-in people relative to your counter limit E.g. If you put a counter limit of 50 and 32 people have signed in it will show 32/50
The counter limit will not limit the number of people who can check in for a service. Ie. If you put a counter limit of 50 and 62 people have signed in it will show 62/50.
If a value of 0 is set the counter will just display the number of people checked in
Registrant Service
A Registrant Service allows for contactless check-in and nametag printing for people who have pre-registered for a service. This service type does not require Elvanto integration to function. To add a Registrant service see Add a Registrant Service. For more information on using registrant services, see Use a Registrant Service.
The list of people this service type searches when using the check-in page is the list of people who are registered for that particular service.
To manage the list of people who are registered, use the Manage Registrants page.
When someone registers for a service they will be sent a QR code
When they attend the service they registered for they can scan their QR code at a kiosk to check-in and print off their nametag.
A limit for how many people can register for a service can be set in the Nametags Settings under “Maximum Registrants”. If Maximum Registrants is set to 0 there will be no limit.
Registrant service Counter and Maximum Registrants
The counter will only be displayed on the check-in page if you are signed in to an Adminosaur account
If you click on the counter it will display a list of all the people who have checked in to that service. The people who registered and those who didn’t will be listed under separate headings.
The counter will display the number of checked-in people relative to your maximum registrants. E.g. If you put maximum registrants at 50 and 32 people have signed in it will show 32/50
The maximum registrants will not limit the number of people who can check in for a service. Ie. If you put maximum registrants at 50 and 62 people have signed in it will show 62/50.
If a maximum registrants value of 0 is set, the counter will just display the number of people checked in.
The ‘Registered’ counter displays the number of registered people who have checked in, while the ‘Walkins’ counter displays the number of unregistered people who have checked in.
You already have a windows device setup and configured as desired.
You have Chrome installed (you may have to convert the tablet from S mode into regular Windows)
Download the driver for the printer being used and run it
Connect Printer to tablet if it isn’t already
Restart the tablet
Go to Control panel, then Devices and Printers
Right-click the printer being used and select “Set as Default Printer”
Note: if you do not see your printer listed make sure 'Editor lite' is disabled on the printer. To do this you can find the 'Editor lite' button situated between the 'cut' and 'power' buttons on the printer.If the light above the 'Editor lite' button is on, press the 'Editor lite' button to disable it.
Go to “ https://[SubDomain].adminosaur.com/admin “ replacing the subdomain for the one specific to your church
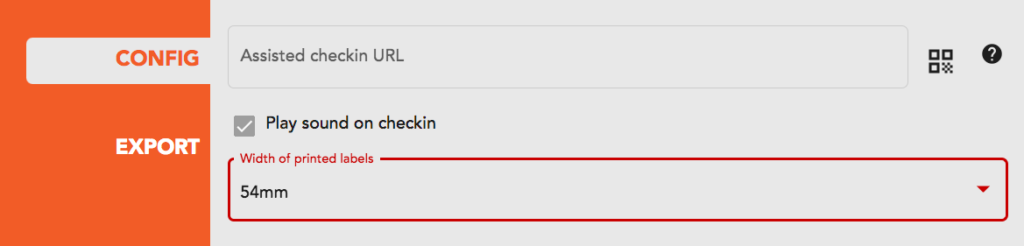
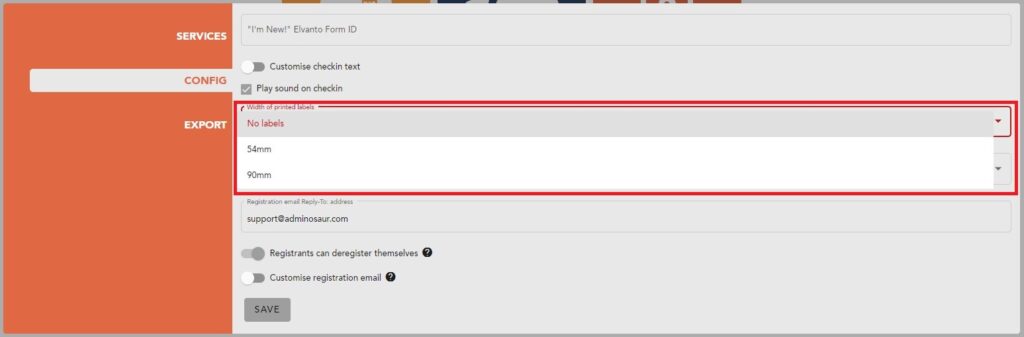
Go to the Nametags settings ‘Configuration’ tab and set the width of the labels for the printer being used. 54mm for Dymo 25mmx54mm (11352) labels and 90mm for Brother DK-11201 labels. Press Save.
Go to Nametags, Select a service and print a name tag. When the print dialogue opens check that the correct printer is selected and change the layout to landscape. Open “more settings” and set the Margins to “None”. Now press print. Please note that if you connect a different printer to the tablet you need to change the printer in the print dialogue as it will try print to the printer you previously had connected.
Create a new Shortcut for Chrome. Place the shortcut on the desktop of the device. You will need to use this shortcut to open chrome in the future, otherwise the printing won’t work correctly
Right-click on the Shortcut, Select “Properties”
Add the following text into the ‘Target’ field, after the existing text (inserting in the subdomain for your church): “https://[SubDomain].adminosaur.com/nametags/service/select” –kiosk-printing –kiosk The target should already include something like “C:\Program Files (x86)\Google\Chrome\Application\chrome.exe”, and will now have the text you added as well and so should read (the first bit may depend on your setup): “C:\Program Files (x86)\Google\Chrome\Application\chrome.exe” “https://[SubDomain].adminosaur.com/nametags/service/select” –kiosk-printing –kiosk The ‘–kiosk-printing’ flag automatically accepts the print dialogue when it appears, and the ‘–kiosk’ flag opens the browser in fullscreen kiosk mode.
There are a total of 4 ways you can check into a service
1. Regular / on-site checkin
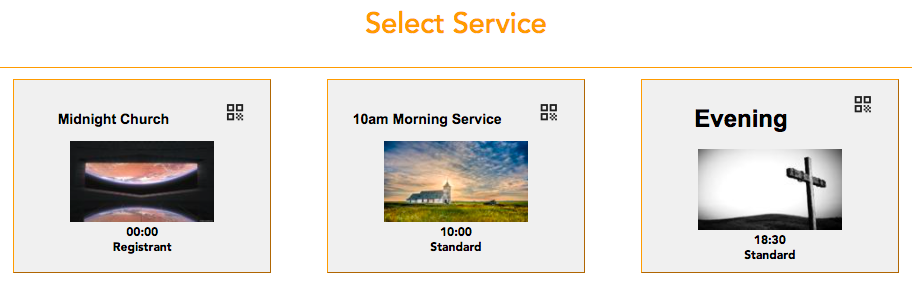
This checkin mode is accessed by selecting the service tile on the Select Service page. Label printing is available. Checkins will not redirect to any other page. This is enabled and working by default. More information on this is listed below
2. Online checkin
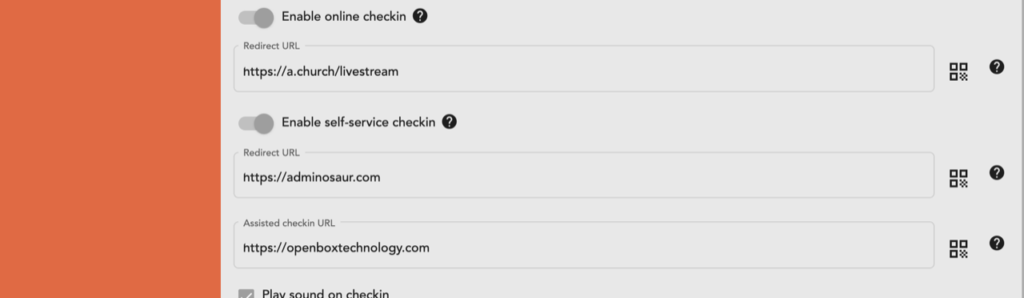
This checkin mode is used to access services which are conducted online, so church members can check in at home before watching the online service. Users will need to type their name into the checkin page as usual, and after a successful checkin they will be redirected to the Online Redirect URL you provide on the config tab, under the toggle ‘Enable online checkin.’.
On an individual service, you can overwrite the URL provided on the config tab by adding in a URL to the ‘Overwrite online redirect URL‘ field.
This checkin mode is intended to be shared via email, webpage etc for access to an online church service. In this mode label printing is disabled. The Link to this mode can be found in the services tab of Nametags Settings.
If you do not enter a Redirect URL, the checkin will not redirect after submission.
3. Self-service checkin.
This checkin mode allows users to scan a QR code displayed on a tablet, phone, etc when they walk into the church, which will take them straight to the Adminosaur checkin page. Users will need to type their name into the checkin page as usual, and after a successful checkin they will be redirected to the Self-service Redirect URL you provide on the config tab, under the toggle ‘Enable self-service checkin’. Once you use the toggle ‘Enable self-service checkin’, a new Self-service QR code button will appear at the top of each service tile. On an individual service, you can overwrite the URL provided on the config tab by adding in a URL to the ‘Overwrite self-service redirect URL’ field.
This checkin mode is designed to streamline the process for checking in to both adminosaur and a government app. You can use the government app URL (the government supplied QR-code) as the Redirect URL, and any concierge web-forms also provided as the Assisted Checkin URL. You can use the ‘QR Code Scan’ function in the settings page to scan your unique code and insert into the Adminosaur system. In this mode label printing is disabled. A link to this mode can be found in the services tab of Nametags Settings.
If you do not enter a Redirect URL, the checkin will not redirect after submission.
4. Assisted self-service checkin: This checkin mode is accessed by selecting the Assisted Checkin button on the Self-service QR code page. It is intended for concierge/assisted checkins, where an Adminosaur user helps check someone in who does not have a smartphone (or may not be able to use it well). Label printing is available. Checkins will redirect to the Assisted checkin URL shown above after a successful checkin.
If you do not enter a Redirect URL, the checkin will not redirect after submission.
Regular Checkin Guide:
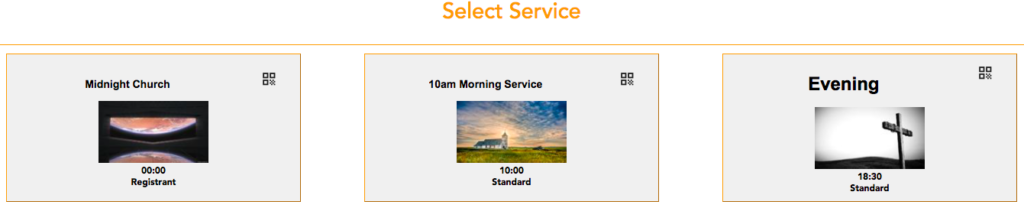
To check a person in to a service you will need to go to the ‘Select a Service’ page. There are two ways to do this, the first is to select the Nametags tile on the Dashboard (you will need an account with ‘Nametags – All Services’ or ‘Nametags – Admin’ permission). The second is to navigate directly to “https://[yoursubdomain].adminosaur.com/nametags/service/select”. The second method does not require you to be signed into an account
Select the service you want to check people in to. If it does not exist, contact an admin and ask them to Add A Service.
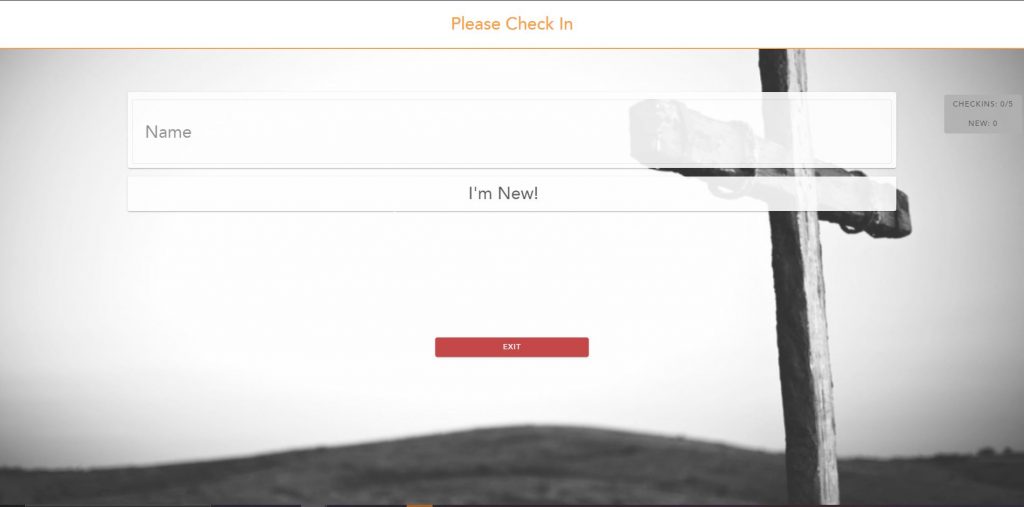
You will now see the Checkin page. Type the name of the person you want to check-in and select their name in the drop down list. A nametag will now print, or if the person is associated with a family, the family check-in list will appear. If the family list appears, select the family members you want to check-in, and then press ‘Print Nametag’.
If the person is new, select ‘I’m New’, fill out the form and press ‘Print Nametag’.
If nametag printing is disabled, the ‘Print Nametag’ button is replaced with a ‘Checkin’ button
If you are using a registrant service instead of typing in a person’s name you can scan their QR code to check them in. If the person is associated with a family you will still need to select the family members to checkin.
If you are signed into an account that has ‘Nametags – All Services’ or ‘Nametags – Admin’ permission, you will see a grey box to the right of the name field. For a standard service, this box shows you the total number of people relative to the counter limit (if set) and the number of new people who have checked in. For a registrant service it shows the total number of people relative to the registrant limit (if set) and shows how many of the people checked in registered and how many didn’t.
Clicking on the grey box will bring up a list of the people checked in listing them under the relevant headings shown in the box. Clicking on a name will show their contact details and allow you to undo their checkin. If for example they were checked in by accident.
The Nametags module is designed to check-in and optionally print off nametags for members of your congregation.
Clicking on the Nametags tile on the home page will take you to the select a service page where you can choose the service you want to check people into.
Clicking on the cog in the top right corner of the nametags tile will open the Nametags settings. Only users with Nametags admin permission can access Nametags Settings.
There are two service types in the Nametags module: Standard and Registrant. For More information on service types and to decide which one best suits your needs see About Service Types.
The groups module allows you to manage kids groups and provide a high level of duty of care.
Clicking on the Groups tile on the home page will take you to the select group page where you can choose the group you want to check people into and see information about those checked into a group.
Clicking on the cog in the top right corner of the Groups tile will open the Groups settings. Only users with admin permission can access Groups Settings.
You will need to be logged in to Elvanto and have access to the ‘Forms’ section. You will also need to have the ‘Nametags – Admin’ permission in Adminosaur.
1. Add a new form in Elvanto. Title it however you would like.
2. Add the following form fields you would like to have on the form. You MUST include the following fields, in any order. Additional fields will not be shown in Adminosaur.
‘First Name’ = Elvanto First Name Person field
‘Last Name’ = Elvanto Last Name Person field
‘Mobile Number’ = Elvanto Mobile Number Person field
‘Email Address’ = Elvanto Email Person Field
3. Click ‘Embed’ up the top right of the forms page in Elvanto. In the ‘Link’ section, you should see a URL in the style of https://[your-elvanto-domain].elvanto.com.au/form/[form-id]. Copy the form id from this URL.
4. Open up the Nametags Settings section in Adminosaur by clicking the cog icon on the Nametags tile on the Dashboard. Paste the Elvanto form ID into the ‘Form ID’ field in the Config tab. Ensure you only include the form-id part of the URL, not the rest of it.
5. *OPTIONAL* If you are using the ‘Locations’ function in the services, you can add in the ‘Locations’ field in the elvanto form.
To add a service, press the ‘Add New Service’ button. You will need to enter the following details:
Name – An easy to recognise name for the service (this is only for Adminosaur)
Time – this needs to be in HH:MM format. This should correspond with the same service in elvanto, otherwise the import will create a new service with the time you enter here.
Service Type – Select “Standard”
*OPTIONAL* Elvanto Location ID – This should be the location ID of service you are creating. This is only relevant if you want to see what ‘location’ people are in when they use the ‘I’m New’ form. If you use this, make sure you include the ‘Location’ field in the I’m New form configuration. Your location ID can be found by going to the relevant “location” in Elvanto and then copying the Location ID from the URL. The URL should look like this, with the location ID at the end: https://[your-elvanto-domain].elvanto.com.au/admin/settings/locations/[location-id].” Please contact us for more information, or to find your location ID’s.
*OPTIONAL* Counter Limit – Will give a visual limit to the number of checked in people. Doesn’t limit the number of people that can check in. For more information see About Service types
Image upload – please upload an image to be displayed as a background on the check-in page. This should be different for each service (as it helps you identify what service you are checking people in to)
To edit a service, click the service you want to edit. It will pop up with all the fields, allowing you to edit them. Press save when you are finished. This will also allow you to delete the service if you choose.
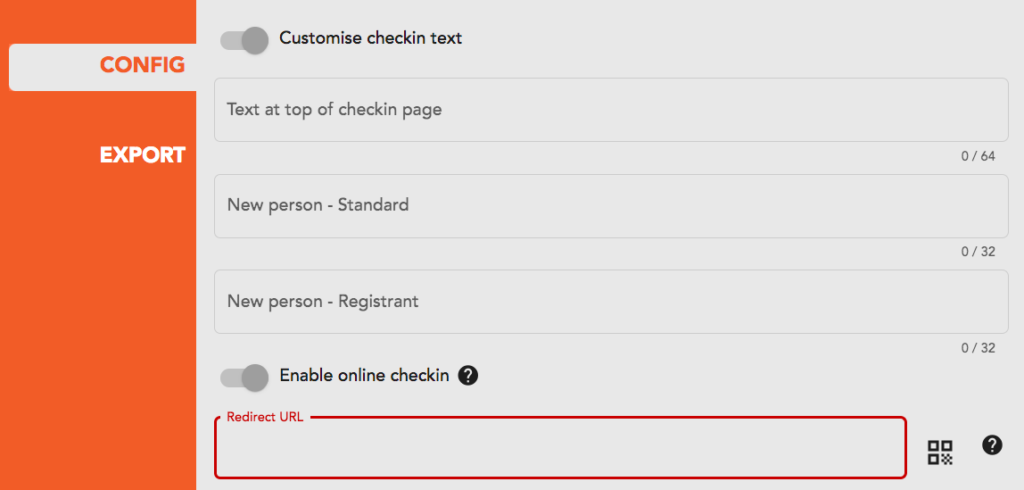
Here you can toggle whether you want to replace the text on the checkin page with your own custom text.
There are three sections of text that can be customised; the text at the top of the page, and the I’m new form on both standard and registrant services.
Please note that there is a character limit on these text boxes and that the custom text will be the same for all services.
Online and Self-Service Checkin Toggles
Here you can enable online and self service check in. To find out more about online and self service check in see Check-in a person (Nametags).
Play sound on checkin
Here you can select whether you want a sound to play when people successfully checkin.
Here you can select the width of labels that you are using.
If you don’t want to print nametags you can disable this feature by selecting “No Labels.”
Click the ‘size of labels’ link above for more information.
Change the nametag layout
Here you can change the layout of printed nametags. There are three options to choose from:
Preferred Name only
Preferred Name on top, Last Name on bottom
Preferred Name on top, Full Name on bottom
If the person doesn’t have a preferred name, the first name will be used instead.
Registration reply-to email
Here you can add a Reply-To email address to registration emails. If set, users who Reply or Reply All to the confirmation message with thr QR code will reply to the address you nominate.
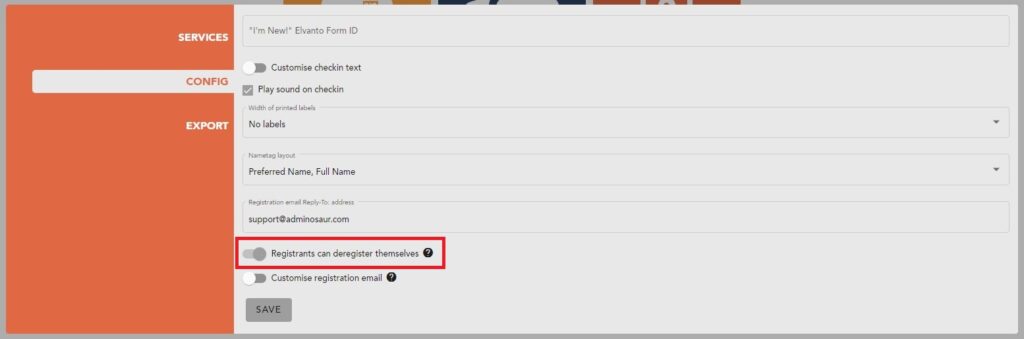
Toggle allowing registrants to deregister themselves
Adds a link at the bottom of the registration email allowing registrants to deregister themselves from the service.
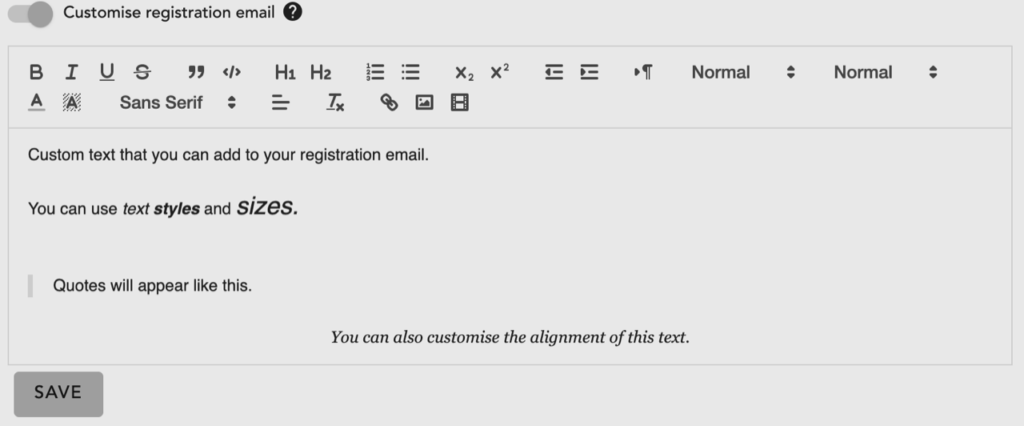
Custom registration email text
Allows you to add custom text below the QR code on the registration email. Please note that there is a character limit of 500 characters, including code for styles, fonts, line breaks, etc.